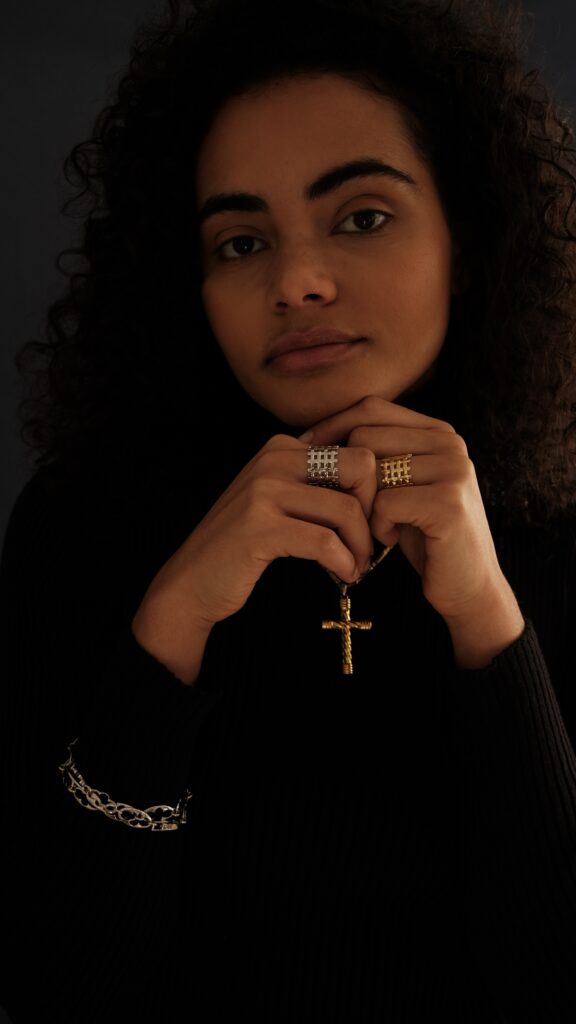
Precious Metals
HOW TO MEASURE YOUR RING SIZE AT HOME FOR LUXURY PURCHASES
A diamond cut is a key factor to consider when choosing your next piece of diamond jewelry.
By Chinwe, Chief Creative Officer
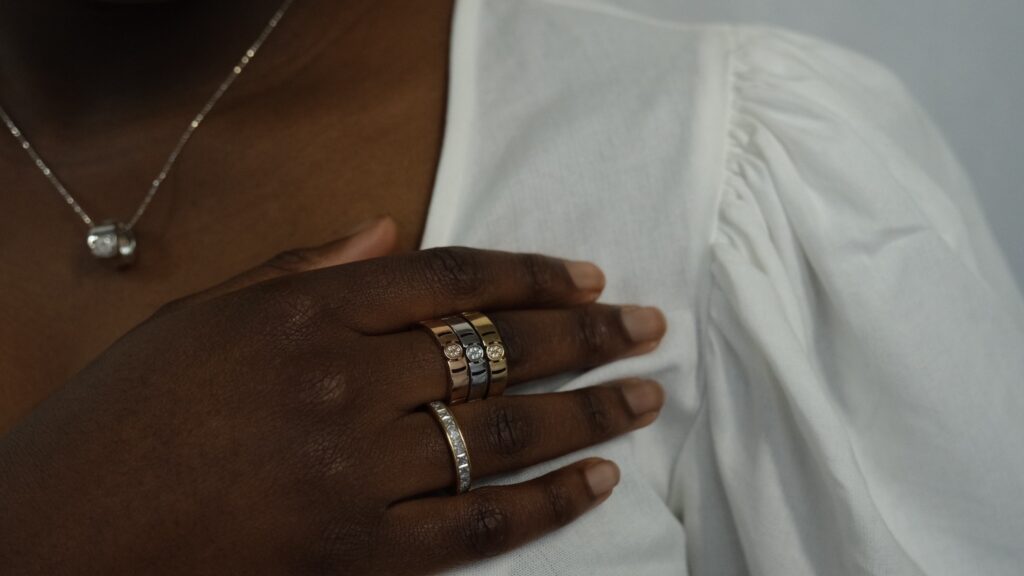
There’s a particular kind of anxiety that accompanies buying a luxury ring online—the kind that keeps you hovering over the checkout button at 2 AM, your cursor trembling between “add to cart” and “close tab.” You’ve found the perfect piece: the platinum band with the hand-engraved milgrain edge, the vintage-inspired sapphire halo, the contemporary tension-set diamond that stopped your breath mid-scroll. The craftsmanship is impeccable, the price is significant, and there’s just one problem: you have no idea if it will actually fit your finger.
This is where knowing how to measure your ring size transforms from a minor inconvenience into a critical skill—one that protects five-figure investments, prevents structural damage to irreplaceable pieces, and determines whether your dream ring becomes a cherished heirloom or an expensive mistake gathering dust in a drawer.
The luxury jewelry landscape has fundamentally changed. Direct-to-consumer fine jewelry brands, international artisan workshops, custom engagement ring designers, and online estate jewelry dealers have democratized access to extraordinary pieces—but they’ve also transferred the responsibility of accurate sizing from the jeweler’s counter to your kitchen table. When you’re spending $8,000 on a vintage Cartier band or commissioning a $25,000 custom engagement ring from a designer three time zones away, understanding how to measure your ring size with jeweler-level precision isn’t optional—it’s essential.
The stakes extend beyond money. Some luxury rings simply cannot be resized. Eternity bands with stones encircling the entire shank, tension settings that rely on precise structural integrity, certain mixed-metal designs, rings with continuous patterns, and pieces crafted from metals like tungsten or titanium are permanent commitments. Get the size wrong, and you’ve purchased a beautiful object you cannot wear. Even rings that can be resized face risks: resizing can compromise stone settings, disrupt engraving, create weak points in the metal, void warranties, and require complete reconstruction for width adjustments beyond a half size.
Yet despite these high stakes, most people approach how to measure your ring size with alarming casualness—a hasty string measurement, a single test with a plastic sizer, a guess based on a costume jewelry ring purchased years ago. The result is a luxury jewelry industry where jewelers report that nearly 40% of online ring purchases require resizing, where surprise proposals are derailed by ill-fitting rings, and where customers spend hundreds or thousands in additional fees to correct a measurement that should have taken fifteen minutes to get right.
This guide exists to change that. What follows is the comprehensive, jeweler-vetted approach to how to measure your ring size at home—not through shortcuts or approximations, but through multiple verification methods, scientific understanding of finger anatomy, professional-grade technique, and the kind of precision that luxury purchases demand. You’ll learn why your fingers are more complex than you think, which measurement methods deserve your trust, how to account for variables that most people never consider, and ultimately, how to approach that online checkout with the quiet confidence that comes from knowing your ring will slide perfectly into place. pulvinar dapibus leo.
The luxury jewelry buying journey has migrated from hushed boutiques with white-gloved consultants to laptop screens at midnight. This shift brings extraordinary access—to independent designers in Tel Aviv, estate pieces from London auction houses, custom ateliers in New York, vintage specialists in Tokyo—but it also eliminates the safety net of in-person sizing.
Consider the typical luxury ring purchase today. You’re browsing Instagram, where a small-batch jewelry designer showcases a rose-cut diamond ring in recycled gold that makes your heart stop. The designer works alone, crafts only twelve pieces per month, and ships internationally. There is no showroom. There are no try-on appointments. There is only an email exchange, a wire transfer, and your answer to the question: “What’s your ring size?”
Or perhaps you’re planning a proposal. You’ve selected a $15,000 bespoke engagement ring from a designer whose waiting list stretches six months. You have one chance to get the size right, because the ring’s intricate pave setting cannot be resized without resetting hundreds of micro-diamonds—a process that costs $2,000 and takes eight weeks.
Understanding how to measure your ring size accurately has become the foundational skill that makes these purchases possible. But it’s not merely about online shopping. Luxury watch collectors who add signet rings to their collections, jewelry investors purchasing estate pieces at auction, minimalists investing in a single perfect everyday ring, travelers buying statement pieces abroad, and anyone inheriting a family diamond who needs a new setting—all require precise self-knowledge about ring fit.
The cost of getting it wrong extends beyond inconvenience. Resizing a platinum ring typically costs $150 to $300. Resizing a ring with channel-set diamonds can cost $500 to $1,200. Resizing an intricate vintage piece may require a specialist jeweler who charges $800 or more—if they’ll touch it at all. Some jewelers refuse to resize rings they didn’t create, citing liability concerns. Insurance policies sometimes exclude coverage for damage caused by unauthorized resizing. And certain luxury maisons void warranties entirely if their pieces are altered by third parties.
Then there’s the structural reality. Resizing changes the metal’s molecular structure at the joint point, creating a potential weak spot. Rings sized up more than a half size require additional metal that may not perfectly match the original—particularly with vintage pieces or uncommon gold alloys. Rings with continuous patterns, interior engraving, or enamel work can be impossible to resize without visible disruption.
Learning how to measure your ring size correctly the first time protects your investment, preserves your ring’s structural integrity, maintains warranty coverage, and saves the emotional toll of receiving a dream piece that doesn’t fit—then facing weeks or months without it while it’s corrected, if correction is even possible.
-
Basket Ring – 18K Gold, White Gold
18K Yellow Gold, White Gold
£2,344 Select options This product has multiple variants. The options may be chosen on the product page -
Constellation Bracelet – Platinum
Platinum 950
£22,661 Select options This product has multiple variants. The options may be chosen on the product page -
Oval Tied Fine Chain Necklace – 18K Gold
18K Gold
£4,298 Select options This product has multiple variants. The options may be chosen on the product page
If ring sizing were simple, jewelry stores wouldn’t employ trained specialists whose sole job involves analyzing finger anatomy and recommending sizes. The human finger is not a static cylinder. It’s a complex structure where bone, tendon, skin, and fluid retention create a sizing puzzle with more variables than most people imagine.
The most common mistake in how to measure your ring size is assuming your finger has one consistent diameter. In reality, most people have a knuckle that’s larger than their finger base—sometimes substantially. A ring must pass over the knuckle to reach the wearing position, but it must also sit securely on the narrower base without spinning. This creates an inherent compromise: sized for the knuckle, the ring spins and feels loose; sized for the base, it won’t fit over the knuckle or requires uncomfortable force.
Professional jewelers assess this knuckle-to-base differential carefully, typically recommending a size that slides over the knuckle with gentle resistance (you should feel it, but it shouldn’t hurt) and sits on the base with minimal movement (you can rotate it, but it doesn’t spin freely). For most people, this means sizing to the knuckle—but for those with significant size differences, it may require compromise solutions like hinged shanks, partial sizing, or accepting a slightly looser base fit.
Temperature dramatically affects finger size in ways that catch people off guard. Cold causes vasoconstriction—blood vessels narrow, reducing finger circumference by up to a full size. Heat causes vasodilation and fluid retention, swelling fingers by a half to full size. This means the ring you measure for in your air-conditioned bedroom at 9 AM may feel completely different on your finger during an outdoor summer wedding at 4 PM.
Time of day matters too. Fingers are typically smallest in the morning and largest in the late afternoon or evening, as fluid retention accumulates throughout the day. Sodium intake, alcohol consumption, hormonal fluctuations, pregnancy, certain medications, and high-altitude travel all impact finger size. For women, ring size can fluctuate with menstrual cycles. For everyone, weight changes of just five to ten pounds can alter finger size by a quarter to half size.
Another widespread error in understanding how to measure your ring size is ignoring ring width compensation. A 2mm delicate band and a 6mm wide comfort-fit band measured at the same ring size will feel entirely different on your finger. Wide bands cover more surface area, creating more friction and pressure. They also feel tighter because they sit closer to the knuckle joint. Jewelers typically recommend sizing up a quarter to half size for rings wider than 5mm, and a full size up for rings wider than 8mm.
The comfort-fit versus standard-fit distinction compounds this. Comfort-fit bands have a rounded interior that reduces contact area with your finger—they slide on more easily and feel looser than standard-fit bands of the same size. If you measure using a standard ring sizer but purchase a comfort-fit luxury band, you may find it fits more loosely than expected.
International sizing conversion creates another layer of complexity. US sizes use a numerical system (size 6, 6.5, 7), UK uses alphabetical (size M, N, O), European uses circumference in millimeters (size 52, 54, 56), and Japanese uses numerical but on a different scale. Conversion charts exist, but they’re not perfectly standardized—different jewelers sometimes use slightly different equivalents, particularly for half sizes. A US 6.5 might translate to a UK N or N½ depending on the jeweler’s chart.
Perhaps most critically, most people measure once, hastily, under non-ideal conditions, and assume that single measurement is accurate. Professional jewelers measure multiple times, at different times of day, across several days, using multiple methods to verify consistency. Learning how to measure your ring size properly means embracing this repetition—because the cost of error is too high for luxury purchases to rely on a single data point.
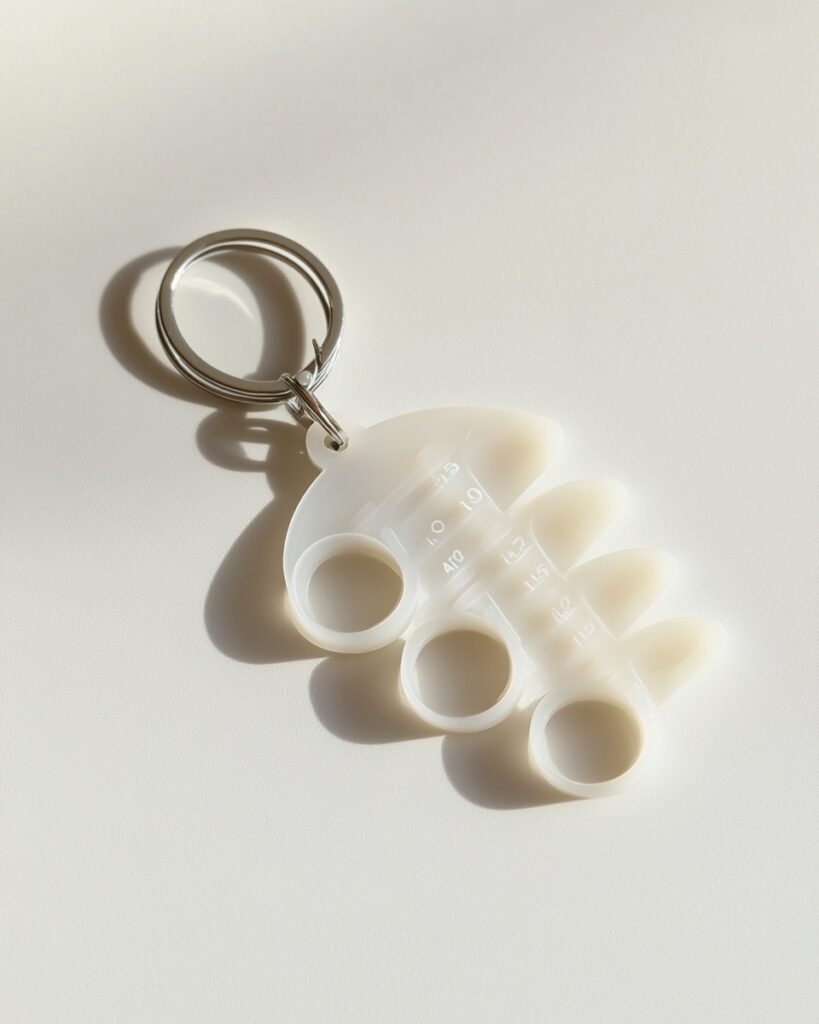
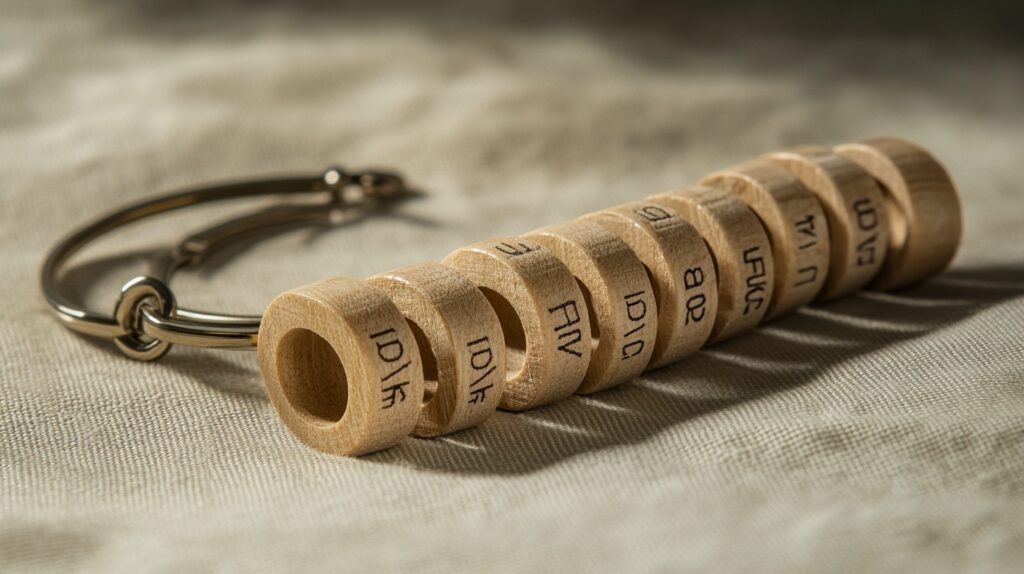
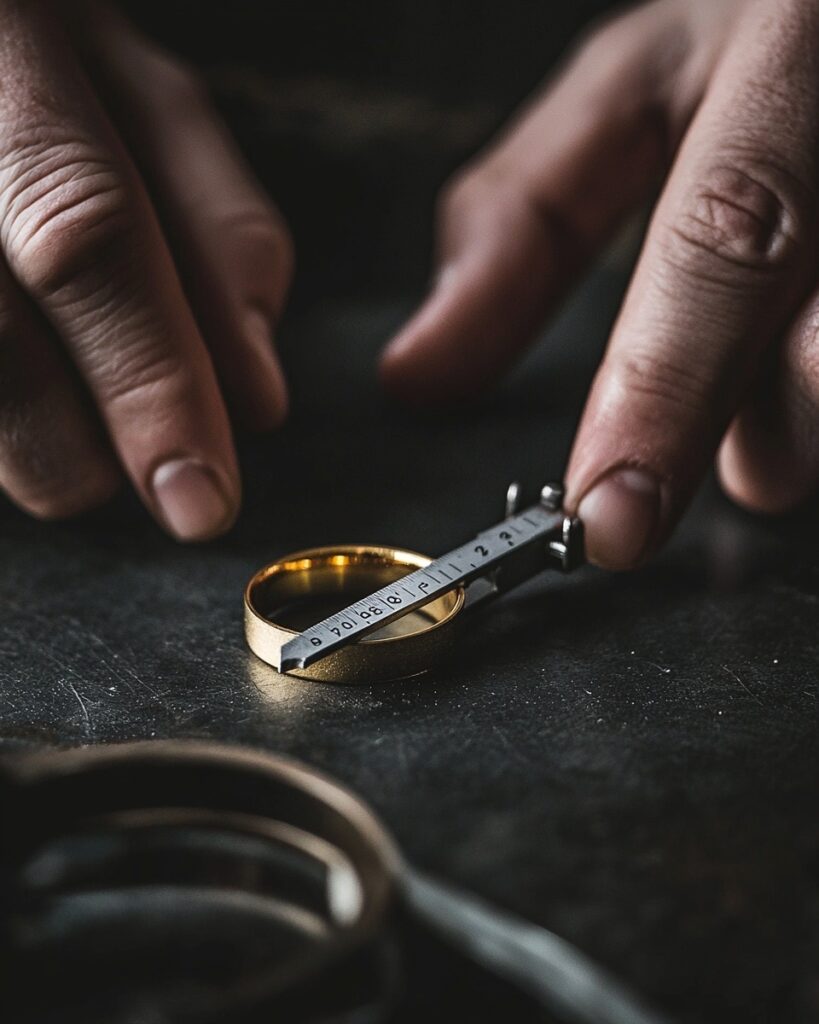
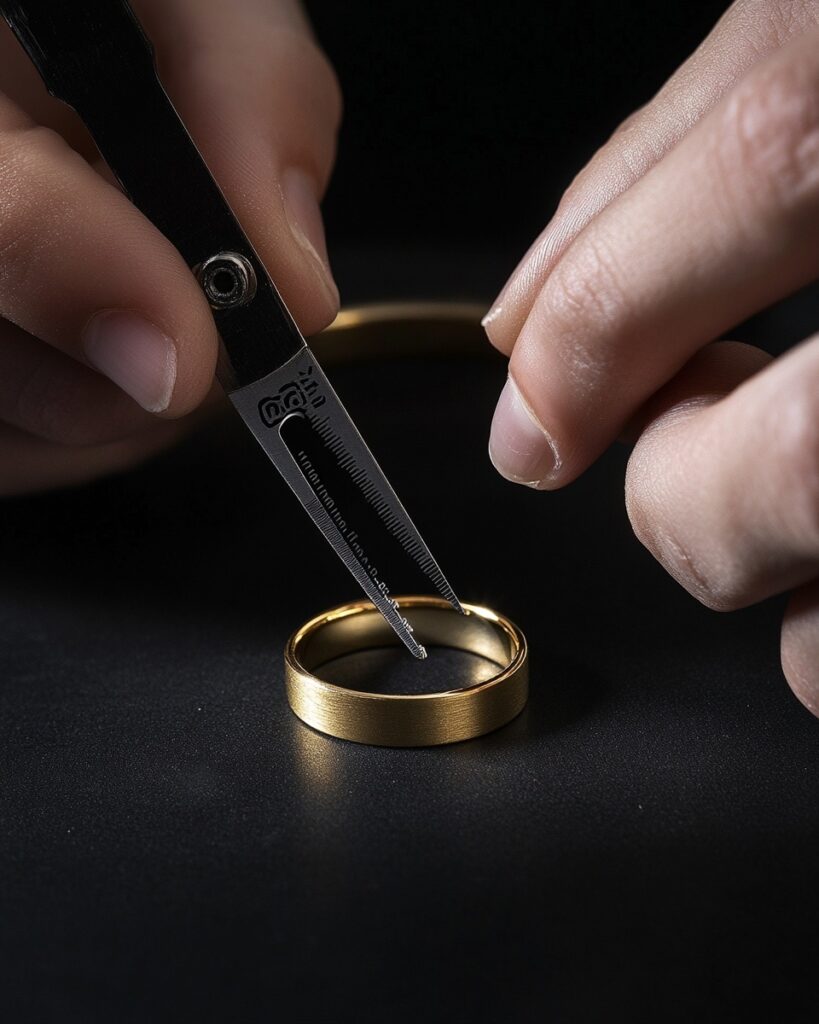
When jewelers need to know how to measure your ring size with absolute certainty, they reach for professional sizing tools—either a graduated ring sizer set (a collection of metal or plastic rings in half-size increments) or a ring mandrel (a tapered cone marked with size gradations). These tools exist because they eliminate guesswork and provide tactile verification that no measurement-and-conversion method can match.
Sourcing Quality Ring Sizers
Not all ring sizers are created equal. The $8 plastic ring sizer sets sold on Amazon can work, but they have limitations: they may not be perfectly calibrated, the plastic can wear and distort with use, and they typically come in full sizes only, missing the critical half sizes that often make the difference in fit. For luxury ring purchases, invest in a professional-grade metal ring sizer set ($20-$40 online from jewelry supply companies) or borrow one from a local jeweler—many jewelers will let you borrow a set or use one in-store at no charge if you explain you’re preparing for a significant purchase.
Metal ring sizers are precision-machined to exact specifications and include both full and half sizes. Look for sets that range from at least size 4 to size 12 (or wider if needed) to ensure you capture your actual size. The rings should be marked clearly with their size and should have some weight to them—quality metal sizers mimic the feel of actual rings better than feather-light plastic versions.
Ring mandrels offer another professional approach. These tapered wooden or metal cones display size markings along their length. You can test existing rings by sliding them onto the mandrel to find their size, or use the mandrel with a strip sizer (a measuring tape designed specifically for ring sizing that wraps around the mandrel at different diameters).
This is where technique separates accurate sizing from approximation. Here’s the step-by-step professional approach to how to measure your ring size with a ring sizer set:
Step 1: Time Your Measurement Measure when your fingers are at normal temperature—not immediately after waking, after exercise, during extreme heat or cold, or after consuming salty foods or alcohol. Late morning or early afternoon, in comfortable room temperature, after you’ve been awake and moving for a few hours, typically provides the most representative size.
Step 2: Start With Your Best Guess If you wear rings regularly, start with a size close to what you think you are. If you’re unsure, start in the middle range (women often fall between size 5 and 7, men between 8 and 10, but individual variation is enormous).
Step 3: Perform the Slide Test Slide the ring over your knuckle. It should require gentle pressure—you should feel resistance, but it shouldn’t hurt or require forceful pushing. If it stops at the knuckle and won’t pass without significant force, it’s too small. If it slides over with zero resistance, it’s too large.
Step 4: Check the Base Fit Once the ring is on your finger at the base (where you’d wear an actual ring), rotate it. It should turn with slight resistance. You should be able to move it, but it shouldn’t spin freely with the slightest touch. Shake your hand downward sharply—the ring should stay in place. If it flies off or slides forward significantly, it’s too large.
Step 5: The Removal Test Remove the ring. It should slide back over the knuckle with the same gentle resistance you felt putting it on. If removal is painful, requires soap or water, or leaves a deep indentation in your skin that lasts more than 30 seconds, the ring is too tight.
Step 6: Test Adjacent Sizes Try the half size smaller and half size larger. This comparative testing reveals whether you’re truly at the right size or just close. The perfect size should feel noticeably better than both the smaller (easier to get over the knuckle) and larger (more secure at the base) options.
Step 7: Wear Test Leave the correctly-sized ring on for 15-30 minutes while going about normal activities. Your finger should feel comfortable—no throbbing, numbness, or indentation forming. The ring should stay in position during hand movements but should never feel stuck.
Step 8: Repeat on Multiple Days Test again the next day, and ideally at different times of day. If you consistently measure the same size across multiple sessions, you’ve found your accurate size.
-
Aku Wave Ring – 18K Gold
18K Gold
£3,094 Select options This product has multiple variants. The options may be chosen on the product page -
Arc Ring – 18K Rose Gold 0.24ct
18K Rose Gold
£3,048 Select options This product has multiple variants. The options may be chosen on the product page -
Oval Tied Fine Chain Necklace – 18K Yellow Gold, White Gold
18K Yellow Gold, White Gold
£4,298 Select options This product has multiple variants. The options may be chosen on the product page
The Knuckle Compensation Decision
If your knuckle is significantly larger than your finger base, you’ll face the classic ring sizing dilemma. Professional jewelers typically recommend sizing to your knuckle if the differential is a full size or more—this prevents the ring from getting stuck during removal and reduces the risk of painful swelling if your hands get puffy. You’ll accept that the ring sits slightly loose at the base, but you gain the security of easy removal.
For smaller differentials (a half size), you might size between knuckle and base, accepting slightly snug knuckle clearance for better base security. Ring adjuster beads—small metal beads soldered to the inside bottom of the shank—can help stabilize a ring sized for knuckle clearance, preventing excessive spinning without tightening the overall size.
Why This Method Works
Ring sizers are accurate because they eliminate interpretation. There’s no measurement to misread, no math to miscalculate, no printer calibration to trust. You’re experiencing the exact fit of each size on your actual finger. This tactile feedback—how it feels to slide over your knuckle, how secure it sits at the base, how easily it rotates, how comfortably it wears—provides information that no numerical measurement can capture.
For luxury purchases, this method represents the gold standard for how to measure your ring size at home. If you have access to professional ring sizers, use them. The investment in quality tools or the effort to borrow them is trivial compared to the cost of resizing a $10,000 ring.
The Existing Ring Method: Measuring What Already Fits
If you own a ring that fits your intended finger perfectly, you possess the answer to how to measure your ring size—you just need to extract it accurately. This method works particularly well for surprise proposals, matching band purchases, or when you’re shopping for a finger that already has a well-fitting ring.
Critical First Step: Verify the Fit
Before measuring an existing ring, confirm it actually fits correctly. Many people wear rings that are slightly too large or small without realizing it. Test the ring using the same criteria from the ring sizer method: Does it slide over your knuckle with gentle resistance? Does it rotate with slight effort but stay in place during normal hand movement? Can you remove it easily without pain? Does it leave minimal indentation after wearing?
If the ring fits perfectly, proceed. If it’s slightly loose or tight, you’ll need to account for that in your final size determination.
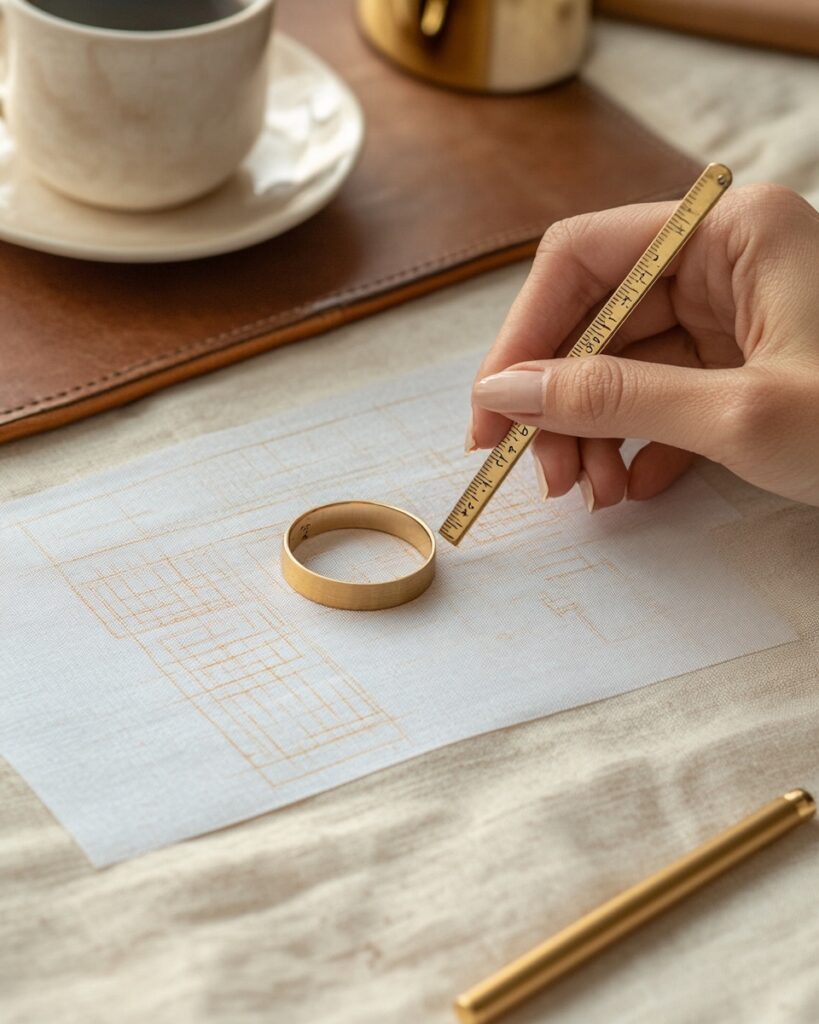
Measuring Inner Diameter Accurately
The most reliable way to convert a ring to a size is measuring its inner diameter—the distance across the inside of the ring at its widest point. This requires precision tools:
Using a Ring Sizing Mandrel: Slide the ring onto the mandrel until it stops. The point where the bottom inside edge of the ring rests on the mandrel indicates the size. Read the marking directly below the ring’s edge. If the ring falls between two markings, it’s a half size.
Using Digital Calipers: Digital calipers ($15-$30) provide the most accurate diameter measurement. Set the calipers to measure the inside diameter of the ring. Place the caliper jaws inside the ring opening and expand them until they just touch both sides. Read the measurement in millimeters. Convert using a professional ring size chart that correlates inner diameter to ring size.
Using a Ring Size Chart: Many printable ring size charts include circles representing different ring sizes. Place your ring over the circles on the chart. The circle that matches the ring’s inner circumference most closely indicates the size. This method is less precise than calipers but more accurate than measuring the outer diameter.
-
Eternity Gap Band Ring – 18K Gold 0.12ct
18K Gold
£2,372 Select options This product has multiple variants. The options may be chosen on the product page -
Round Brilliant Cut Wedding Engagement Ring 18K Gold- 1.29ct
18K Gold
£12,219 Select options This product has multiple variants. The options may be chosen on the product page -
Serenade Wedding Ring – 18K Gold 0.25ct
18K Gold
£1,850 Select options This product has multiple variants. The options may be chosen on the product page
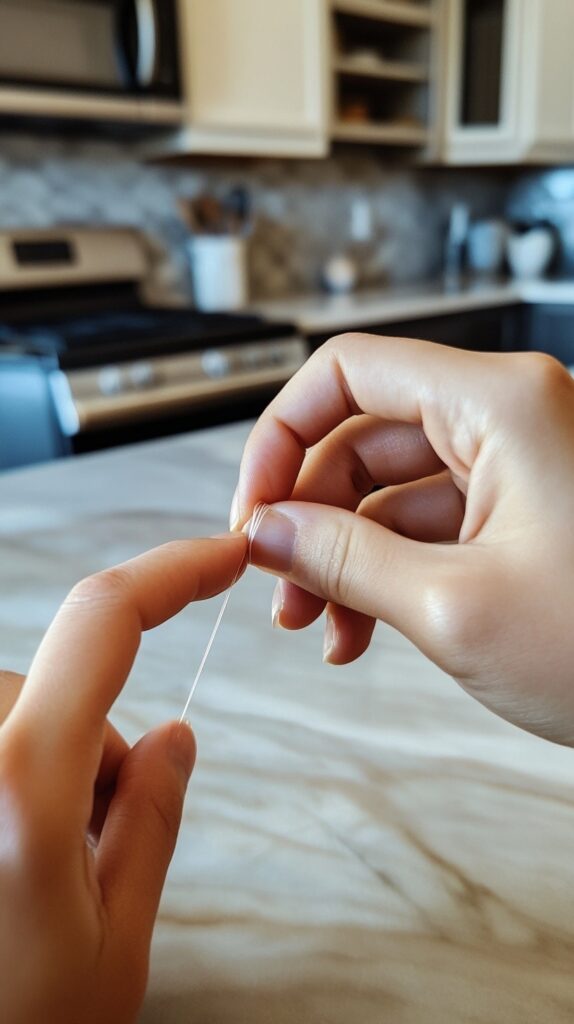
The String or Paper Method: The Most Common DIY Approach (And How to Do It Right)
When people search for how to measure your ring size at home, they inevitably find the string method. It’s simple, requires no special tools, and provides a measurement in minutes. It’s also the method most likely to be inaccurate if not executed with extreme care.
Professional jewelers generally caution against this method for luxury purchases—but if it’s your only option, here’s how to minimize error.
What You Need
- Dental floss, thin string, or a narrow strip of paper (3-5mm wide)
- A fine-point pen or marker
- A ruler marked in millimeters
- A ring size conversion chart
- Steady hands and good lighting
Step-by-Step Instructions
Step 1: Choose Your Material Carefully Use dental floss or non-stretchy, thin string. Avoid yarn, ribbon, or anything with elasticity—stretchy materials will give you a smaller measurement than reality. Paper strips work but tend to tear or twist. Whatever you choose should be thin enough to mimic a ring’s edge.
Step 2: Wrap Your Finger at the Base Wrap the string around your finger at the exact position where you’ll wear the ring—typically at the base of your finger, below the knuckle. This is crucial: wrapping at the knuckle gives you a larger measurement than necessary for the wearing position.
Step 3: Achieve Proper Tension This is where most people fail. The string should be snug but not tight. It should feel like a comfortable ring, not a tourniquet. You should be able to slide the string slightly, but it shouldn’t have significant slack. Imagine the fit of a well-fitting ring and replicate that pressure.
Step 4: Mark the Overlap Where the string overlaps itself, mark both sides of the overlap point with your pen. Make the marks as precise as possible—a millimeter of error here translates to sizing error later.
Step 5: Measure in Millimeters Lay the string flat against your ruler and measure the distance between your two marks in millimeters. This is your finger circumference. Write this number down immediately—don’t trust memory.
Step 6: Convert to Ring Size Use a professional ring size chart to convert millimeters to ring size. The correlation for US sizes:
- 47mm = size 4
- 49mm = size 5
- 52mm = size 6
- 54mm = size 7
- 57mm = size 8
- 59mm = size 9
- 62mm = size 10
Quarter and half sizes fall between these measurements. If you measure 53mm, you’re approximately a 6.5.
Step 7: Test Over the Knuckle Create a loop with your string at the circumference you measured. Try to slide this loop over your knuckle. If it won’t pass comfortably, you need to size up to accommodate knuckle clearance, even if the base measurement suggests a smaller size.
Step 8: Measure Multiple Times Take at least three separate measurements over several hours or different days. If all three measurements are within 1mm of each other, you’ve likely been consistent. If they vary by more than 2mm, your technique needs refinement—you’re applying inconsistent tension.
Critical Errors That Create Inaccuracy
The string method fails when:
- The material stretches during measurement
- Too much or too little tension is applied
- The mark placement is imprecise
- The ruler isn’t properly aligned
- The measurement is taken at the knuckle instead of the base
- Only one measurement is taken
- Temperature or swelling has affected finger size
- The paper strip is too thick and adds circumference
Why Jewelers Discourage This Method
Professional jewelers warn against the string method for luxury purchases because it introduces too many variables for human error. Even a 1mm measurement error—easy to achieve with imprecise marking or tension variation—can result in a half-size difference. When you’re purchasing a $15,000 ring, that half-size error costs hundreds in resizing fees or, worse, results in a ring that can’t be resized.
That said, if you’re geographically isolated, lacking access to jewelers or sizing tools, or in a situation where the string method is genuinely your only option, execute it with obsessive care. Measure five or six times. Have someone else measure you as well. Cross-reference your result with any other method available to you.
-
Asscher Cut Ring 18K White Gold- 0.20ct
18K White Gold
£4,025 Select options This product has multiple variants. The options may be chosen on the product page -
Choupette Ring 2.6ct – Platinum
Platinum 950
£4,543 Select options This product has multiple variants. The options may be chosen on the product page -
Round Brilliant Cut Wedding Engagement Ring – Platinum – 1.29ct
Platinum 950
£11,058 Select options This product has multiple variants. The options may be chosen on the product page
The Printable Ring Sizer Method: Download-and-Cut Sizing
Printable ring sizers represent a step up from the string method—they’re designed specifically for ring sizing and account for the difference between linear circumference and actual ring fit. But they introduce a critical dependency: printer calibration.
The Fatal Flaw Most People Miss
Every printable ring sizer template includes a calibration guide—typically a ruler or square that should measure exactly one inch or 5cm when printed. This is the first thing you must verify, and it’s the step most people skip.
Printers don’t print to exact scale by default. Page margins, “fit to page” settings, PDF scaling, and printer driver settings can all distort the print size by 2-5%. On a ring sizer, that distortion translates directly to sizing error. A template that prints 3% smaller will tell you you’re a size 7 when you’re actually a 7.5.
Using a Printable Ring Sizer Correctly
Download from reputable jewelry organizations or established jewelers. Print at “actual size” or “100% scale” with all “fit to page” options disabled. Immediately verify the calibration guide with a precise ruler—if it’s off, the template is unusable. Cut precisely along marked lines, form the ring following instructions, and test the fit using the same criteria as physical ring sizers: gentle resistance over the knuckle, snug but rotatable at the base, easy removal.
Paper has no weight, no metal friction, and loses structural integrity when damp. Use printable ring sizers to get in the ballpark, then verify with better methods for luxury purchases.
Professional At-Home Sizing Kits: The Luxury Jeweler's Solution
Many high-end jewelers offer free professional sizing kits sent to your home. These typically include professional-grade ring sizers, detailed instructions, information about the jeweler’s specific sizing standards, and a prepaid return envelope. Some brands offer try-at-home programs where you receive actual rings in adjacent sizes to test before purchasing—the gold standard for remote sizing.
Request a professional kit when making significant purchases ($3,000+), buying non-resizable rings, or dealing with complex sizing situations like large knuckle-to-base differentials.
The Science of Perfect Ring Fit: Variables You Cannot Ignore
Mastering how to measure your ring size requires understanding that your finger is not a fixed measurement.
Temperature’s Dramatic Effect
In cold conditions, vasoconstriction shrinks your fingers. In heat, vasodilation causes swelling. A ring that fits perfectly at 72°F may be uncomfortably tight at 85°F and loose at 50°F. Size for your average temperature conditions.
The Time-of-Day Factor
Fingers are smallest in the morning and largest in late afternoon or evening due to fluid retention. Measure during your typical wearing time for accuracy.
Dietary and Hormonal Factors
High sodium intake can increase finger size by a quarter to half size within hours. For people who menstruate, ring size can fluctuate up to a full size during the luteal phase. Pregnancy causes significant swelling, sometimes by multiple sizes. Measure when normally hydrated and account for life circumstances.
The Knuckle-to-Base Differential
For many people, the knuckle is noticeably larger than the finger base. Professional jewelers typically recommend sizing to the knuckle—the ring should slide over with gentle pressure and sit at the base with some rotational movement. For extreme differentials (1.5+ sizes), hinged shanks or ring adjuster beads provide elegant solutions.
Ring Width Compensation: Why Band Width Matters
A 2mm delicate band and a 6mm wide band at the same ring size feel entirely different. Wide bands cover more surface area, create more friction, and feel tighter.
Industry Sizing Adjustments:
- Bands up to 3mm: No adjustment needed
- Bands 4-6mm: Consider sizing up 1/4 size
- Bands 7-9mm: Size up 1/4 to 1/2 size
- Bands 10mm+: Size up 1/2 to full size
Comfort-fit bands (domed interiors) slide on more easily than standard-fit bands (flat interiors) and often fit true to size even when wide.
International Ring Size Conversion
The Four Major Systems:
- US: Numerical (6, 6.5, 7). Size 6 = 16.5mm inner diameter
- UK: Alphabetical (M, N, O). Size M ≈ US 6
- EU: Circumference in millimeters. Size 52 ≈ US 6
- Asian: Different numerical scale. Japanese 11 ≈ US 6
No universal conversion standard exists. Different jewelers use different charts, particularly for half sizes.
Best Practices: Communicate in millimeters rather than converted sizes. Request the jeweler’s specific conversion chart. For high-value international purchases, send a perfectly-fitted ring for them to match, eliminating conversion uncertainty.
-
Halo Platinum Round Brilliant Cut Wedding Engagement Ring 1.27ct
Platinum 950
£10,925 Select options This product has multiple variants. The options may be chosen on the product page -
Platinum Round Brilliant Cut Wedding Engagement Ring 1.29ct
Platinum 950
£11,270 Select options This product has multiple variants. The options may be chosen on the product page -
Ugo signet II Ring – 18K Rose Gold, White Gold
18K Rose Gold, White Gold
£3,173 Select options This product has multiple variants. The options may be chosen on the product page
How to Measure Your Ring Size for Surprise Proposals
The Borrowed Ring Method: Temporarily take a ring they wear on the correct finger to a jeweler for measurement. Return it before it’s missed.
The Friend or Family Intelligence Method: Recruit close friends, siblings, or parents who may know their ring size or can do reconnaissance.
The Jewelry Store Reconnaissance: Browse jewelry stores together casually. Observe which sizes fit as they try on rings.
The Conservative Approach: If you must guess, size slightly large rather than small. A ring that’s a half size too large can be worn temporarily then resized. A ring that’s too small cannot be worn at all.
Confidence, Precision, and the Perfect Fit
Learning how to measure your ring size accurately is neither mysterious nor impossible—it simply requires the same care, precision, and verification you’d apply to any significant investment. You wouldn’t purchase a $15,000 watch without confirming the size fits your wrist. You wouldn’t buy a luxury car without test-driving it. Your ring—an object you may wear daily for decades—deserves equivalent diligence.
The core principles that make how to measure your ring size successful are straightforward: use professional-quality tools when possible, measure multiple times under consistent conditions, verify through independent methods, account for variables like temperature and knuckle size, and when in doubt, consult with professional jewelers who have sized thousands of fingers.
The payoff for this investment of time and care is substantial. You eliminate the anxiety of online luxury purchases, knowing with confidence that your ring will arrive and fit perfectly. You protect your financial investment by avoiding resizing fees or discovering that your dream piece cannot be resized. You ensure comfort—your ring will feel natural from the first moment you wear it, not tight, loose, or awkward.
Most importantly, mastering how to measure your ring size opens access to the full universe of luxury jewelry. You can confidently purchase from international designers, commission custom pieces from artisans anywhere in the world, bid on estate jewelry at auction, and explore direct-to-consumer fine jewelry brands—all without geographic limitation or sizing uncertainty.
The perfect ring fit is not luck. It’s not a mystery only professional jewelers can solve. It’s a learnable skill that combines understanding your unique finger anatomy, using the right measurement tools, accounting for variables, and verifying your results. Follow the methods in this guide with patience and precision, and you’ll understand how to measure your ring size with the same confidence as any master jeweler.
Your ring should slide over your knuckle with gentle resistance, sit securely at your finger base without spinning freely, and feel so natural you forget you’re wearing it. That perfect fit—where metal becomes an effortless extension of your hand—begins with accurate sizing. You now have the knowledge to achieve it.